
Walking along the beach is a fun endeavor in and of itself. The salt breeze, the sun on your face, and the feeling of all of your cares melting away… These things all make for an enjoyable experience on their own. Adding to the experience, is hunting for artifacts that get washed up on shore and offer a souvenir of beauty from the natural wonder of the sea. One of these things to hunt for… is Sea Glass.
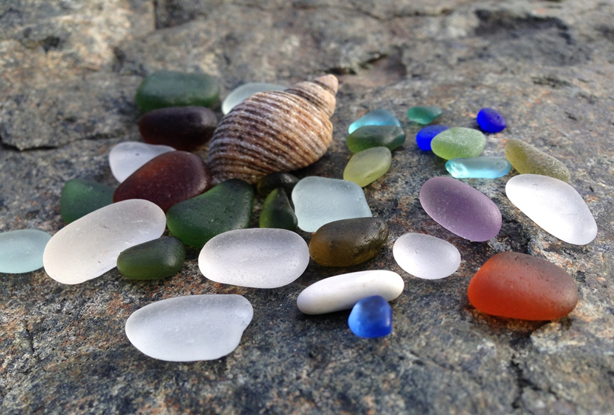
Sea glass is a beautiful piece of smooth, frosted glass that is often found on beaches. It is basically a man-made glass that has been treated with a combination of sand, surf, and stone to become a sea glass gem. The power and relentless thrashing of the ocean waves and the grit of the sand, can wear down the glass over time and create a beautiful piece of art.
Why Should You Be Interested in Sea Glass?
This may sound like pure sentiment, but the entire process associated with sea glass is what makes it very interesting. Sea glass usually comes from glass products that are thrown away. It may come from the empty bottles tossed against the rocks on a beachside. It can also come from glass that is thrown from ships. As mentioned above, the shards of glass get subjected to the tides, surf, and current and lose their rough edges with time. It also acquires a frosty appearance. This is due to the high pH level of seawater. Since seawater is alkaline, it affects the surface of the glass. You’ll notice that as the pH varies across different coastal areas, the amount of frost on the sea glass also changes.
What’s also interesting about sea glass is that even though it comes from discarded glass products, once nature is done with it, it can actually be very expensive.
But what if you can’t just wander down to a seaside beach and look for natural sea glass? Well… let’s talk about an alternative. That alternative is to make your own sea glass in a rock tumbler!
Sea Glass vs. Tumbled Glass Made in a Rock Tumbler
Natural sea glass is the kind that is tumbled and worn smooth through the natural forces of the sea. Tumbled glass is a kind of sea glass that is smoothed through artificial means. You can use a rock tumbler to make this, or you can subject it to chemicals.
There are several ways to tell whether you are dealing with natural or artificial sea glass. For instance, real sea glass has a trademark half-moon shape. The frostiness and pit marks on the surface are also a testament of its authenticity.
Tumbled glass may not be the original thing, but it is still a lot of fun to make these stones. Real sea glass is rare and expensive. Tumbled glass can also be used for so many things as well. It can be used to make jewelry, fill vases, or as ground cover for aquariums and potted plants.
Making Sea Glass in a Tumbler
Making sea glass is a bit of an art and there are a few things that you should know before you get started. Firstly, a rock tumbler is usually used to process rocks like Agate and Jasper. These are hard in nature, whereas glass is soft.
If you check the Mohs scale, then you’ll find that Jasper and Agate rank at number 7 in hardness, whereas glass ranks 5th or 6th.
Since it is softer, it won’t take long to tumble glass. Jasper and Agates take nearly 7 days to tumble. Glass, on the other hand, takes only three to five days. Glass is also a lot less tough. Make sure you place a sufficient amount to tumble. If you don’t, the glass will get tossed around in the tumbler and you will end up with chipped and broken pieces.
Another thing to keep in mind is that your load must consist of a range of particle sizes. If you only have large pieces of glass in your load, then you can consider adding small ceramic pellets. This will cushion the impact when glass strikes glass. Consider adding 2 tablespoons of pellets for every pound of glass. Adding pellets also increases the amount of grinding.
Tumbling glass can produce gas. This is not terribly common, but some types of glass will produce gas while you run them in a tumbler. Make sure you wear safety goggles when you open the tumbler barrel. This will protect your eye against a spatter of grit from the tumbler. You must also try and open the barrel slowly and carefully so that the gas can escape.
Extreme gas buildup can also cause the lid of the rock tumbler barrel to pop off. This will result in all the contents spilling over the floor and your tumbler. Not only is this dangerous, but it can also create a pretty big mess that is not fun to clean up.
Instructions for Making Sea Glass
In order to make sea glass in a tumbler, you’ll need good-quality glass, a 5-gallon bucket, thick plastic bags, cut-resistant work gloves, hammer, safety goggles, a motorized rock tumbler, and a wire mesh colander.
Step 1: Finding Glass
You can look for colored glass at yard sales, recycling centers, and thrift stores. You can also look for discarded glass in your own home. Liquor bottles and wine bottles can be used for making sea glass as well.
Recycling centers are a great source for good pieces of glass. You can also find more colored glass here.
Step 2: Breaking Glass
This is the most dangerous part of making sea glass. Make sure you take all the necessary precautions during this step. Wear cut-resistant work gloves and safety goggles and keep the barrel of your tumbler nearby.
Use the flat side of your hammer and strike the glass object to break it into large pieces. Continue striking until you have small glasses that are uniform in size. Place the contents into plastic bags and then pass them through the wire mesh colander. This will separate the tiny shards of glass from the bigger pieces.
You can gently shake the wire mesh until all the shards have passed through.
Step 3: Tumbling the Glass
Add the chunks of glass to the barrel. You should fill up two-thirds or one-half of the barrel. If you don’t have enough glass, then you can add the ceramic pellets or clean rocks. You’ll also need to add grit. If you have a tumbler with a capacity of 3lb, then 3 to 4 tablespoons of grit will be sufficient.
Run the tumbler for 3 to 5 days. You can check on the status of the glass after 48 hours. There should be some frosting and smoothening of sharp corners at this point.
Continue the tumbling process until all the glass pieces have rounded edges and are evenly frosted. The longer you run them through the tumbler, the more they’ll look like old sea glass.
Step 3: Cleaning Your Homemade Sea Glass
Once your glass is ready, you can place the wire mesh colander over a bucket and filter the sea glass. This will allow the grit to drip through. Next, you can take your glass outdoors and hose it down with water. This will wash away any remaining grit and grime on the glass.
Colors vs. Cost: How Can You Value Sea Glass
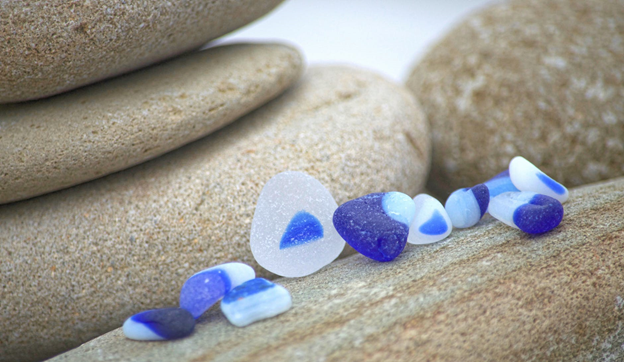
Sea glass is found in many colors. The color of a sea glass gem plays a pretty significant role in determining its value. Rare colors such as deep aqua and cobalt blue are very desirable for a sea glass collector. Colors like yellow and cherry red are also very rare as they are not used often in glass production.
You can also determine the value of a sea glass gem according to its conditioning and frosting. If a piece of sea glass still carries chipped edge and/or translucent sides, then it won’t be of much value – even if it has a rare color.
The thickness and shape of the glass is also a factor. Thick sea glass with a sufficient amount of frosting and no markings will be considered valuable. The individuality of the sea glass gem will also determine its value. For instance, a sea glass gem that carries unique markings and patterns is also considered valuable.
Making Sea Glass Jewelry
Sea glass can be used to make very unique pieces of jewelry. If you’re interested in making sea glass jewelry, then you’ll need wire for your wrapping, flat-nosed and round-nosed pliers, a large jump ring, a chain, water, a small dish, a clasp, a connector, a diamond drill bit (you can use a drill bit of 1 to 1.5mm. If you’re looking to make a larger hole, then a 3mm drill bit will suffice) and a shaft drill.
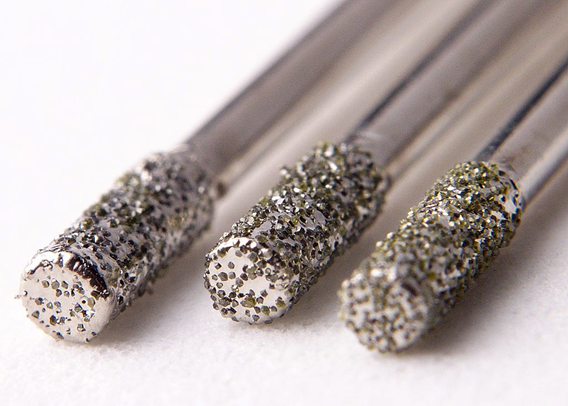
Fill a small dish with water and submerge the glass piece in it. The water acts as a lubricant and keeps the glass and drill bit cool during the drilling process. Use a diamond drill bit and drill a hole through the glass piece. If you are particular about the hole’s location, then you can work with a larger dish. This will help you hold onto the glass piece while you drill. Make sure the glass piece remains submerged throughout the drilling process. The water will get cloudy as you drill through, but make sure you keep drilling in the same spot.
Once you have drilled through all the glass pieces, you can insert the briolette wire wrapping through the holes. If you’re looking to make a necklace, then you can attach this wrapping around the chain. Once all your glass pieces are ready, you can attach all the chains to the jump ring and close it off.
The great part about making sea glass jewelry is that you need very few tools to begin. You don’t really need a lot of technical skills to make sea glass. You can also make it with angular and irregular pieces.
It’s not an overly disruptive process either, and the value of your sea glass is largely preserved. You can take out the wire wrapping and chains and add the sea glass back to your collection. This is especially useful when you are dealing with real sea glass. Given the growing scarcity of sea glass, your collection will grow to become a lot more valuable with time.